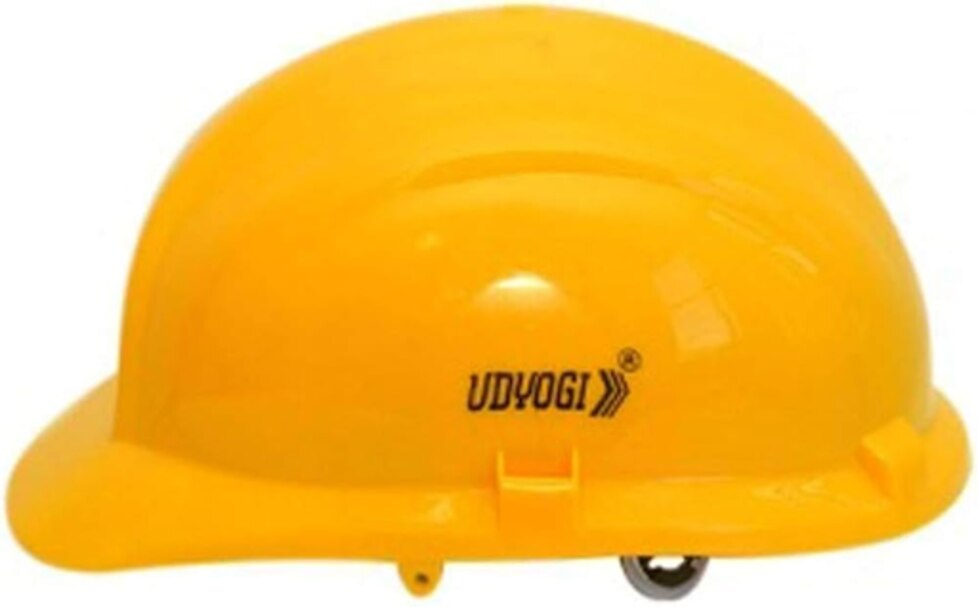
A safety helmet is only effective when its protection matches the hazard, its shell and suspension remain sound, and it stays secured on the wearer’s head. By the end, you will be able to identify the required standard, select the right helmet configuration, fit it correctly, and remove it from service before hidden damage becomes a serious risk.
Key takeaways
- Identify falling-object, flying-fragment, impact, and electrical hazards first.
- Check the helmet’s markings against the hazard and required standard.
- Use shell, suspension, and retention features as one protection system.
- Replace helmets when damage, degraded parts, or failed records show protection is compromised.
Identify the Head-Injury Hazard Before Choosing a Helmet
Choose an industrial safety helmet where work exposes you to falling objects, flying fragments, struck-by incidents, electrical contact, or impacts that could injure the skull. OSHA 29 CFR 1910.135 requires head protection for these hazards; it does not make a helmet a substitute for guarding, exclusion zones, or other controls at the hazard source.
| Hazard | What can happen | Why a bump cap is insufficient |
|---|---|---|
| Falling objects | Tools, materials, or debris can deliver a high-energy blow | A bump cap is not tested for industrial impact or penetration |
| Flying fragments | Chips, shards, and broken components can strike or penetrate the shell | Minor-bump protection does not address projectile energy |
| Struck-by incidents | Vehicles, suspended loads, or moving equipment can hit the head | The force exceeds a bump cap’s intended use |
| Lateral impacts | A side blow can cause injury even when nothing falls from above | Choose a helmet tested for side impact, not top impact alone |
| Electrical contact | An energized conductor can cause shock, burns, or fatal injury | Use head protection with verified electrical insulation properties |
A basic bump cap suits minor contact with fixed objects, such as hitting your head beneath a low beam during maintenance. Remove it from consideration where falling-object, penetration, or electrical hazards exist. For side-impact exposure, an ANSI/ISEA Z89.1 Type II helmet adds lateral-impact testing; a Type I helmet covers top impact only.
Include work at height in the assessment, because climbing helmets and industrial helmets follow different test regimes.
Match the Helmet Marking to the Hazard and Standard
Read the permanent marking, not a sales label, before matching the helmet to the task. It should identify the standard, manufacturer, model and any optional rating; a shell that resembles a construction helmet is not proof of suitable protection.
- Impact and penetration: look for IS 2925:1984 or ANSI/ISEA Z89.1 compliance. Under ANSI/ISEA Z89.1, Type I covers top impact, while Type II adds lateral-impact testing. Choose Type II where a side strike is credible.
- Electrical contact: check the complete helmet’s ANSI class. Class G is tested to 2,200 V, Class E to 20,000 V, and Class C has no electrical protection. These test voltages are not permissible working voltages. Ventilation holes, conductive accessories or unapproved attachments can invalidate the electrical selection.
- Low temperature: verify a specific low-temperature marking or rating; EN 397 does not make this automatic.
- Molten metal: verify the molten-metal-splash marking or optional EN 397 requirement. Do not assume every EN 397 helmet has it.
- Work at height: check the required retention and impact standard, not just the helmet’s shape. EN 12492 and EN 397 use different test regimes. The chinstrap and attachment points must be approved for that helmet and task.
EN 397 includes mandatory tests for vertical shock absorption, penetration resistance and flame resistance. Optional markings matter because choosing an unrated helmet can leave a known hazard untested.
Choose the Shell, Suspension and Retention Features Together
Choose the shell, suspension system and retention features as one protection package, because a suitable shell cannot compensate for a loose harness or an unsuitable attachment.
| Option | What it changes | Choose it when |
|---|---|---|
| Peak | Shades the face and directs rain forward | Routine construction or outdoor work needs visibility and basic weather protection |
| Short peak | Reduces obstruction above the eyes | You must look upward, enter confined spaces or use a face shield |
| Full brim | Adds shade and helps deflect falling debris from all sides | Sun exposure, rain or overhead splashes affect the task |
| Chin strap | Keeps the helmet on during inversion, falls or strong wind | Work at height, climbing, towers or exposed elevated platforms require retention |
| Ventilation | Improves airflow and reduces heat | Heat control matters and the complete helmet remains approved for the hazard |
Check that the harness has secure attachment points, a serviceable sweatband and an adjustment mechanism that holds the shell level without crushing your head. Do not wear a hood or cap beneath it if that changes the designed clearance.
Ventilation holes, conductive accessories and unapproved face shields can destroy an electrical classification. Specify only accessories approved for that helmet model; never drill holes, paint the shell, apply incompatible decals or clean it with solvents.
For work at height, demand an approved chin strap and retention system for the specific helmet and task. EN 12492 climbing helmets and EN 397 industrial helmets use different test regimes, so choose by the required marking and retention performance, not appearance.
Inspect the shell, suspension, strap and attachments before use; an impact, crack, chemical attack or stretched webbing means replacement, not adjustment.
Fit the Helmet So It Stays Stable During Work
Start helmet fitting with the suspension, not the shell. The front edge must sit above your eyebrows while the shell remains level, leaving the manufacturer’s designed head clearance between your head and the shell. Do not wear it over a cap, hood or any item that reduces this space.
1. Loosen the adjustment wheel or rear band, place the helmet squarely on your head, and lower the suspension until it sits evenly around your crown. Tighten it until the helmet feels secure without creating pressure points.
2. Shake your head, bend forward, walk and climb several steps. The shell must not slide over your eyes, tilt backward or lift away from your head. If it moves, retighten the suspension rather than forcing the shell down.
3. Fasten the chin strap whenever the task involves climbing, strong wind, inversion or elevated platforms. Set it below your chin, leave room for comfortable speech and swallowing, and use only a strap and attachment points approved for that specific helmet.
4. Perform the same movement check with the clothing and equipment worn at work. Remove the helmet if a hood, earmuff, face shield or other attachment changes its clearance or balance.
Wear a helmet backward only when its marking or manufacturer’s instructions specifically permit reverse use. A construction hard hat that stays on during walking may still fail to stay in place during a fall; work-at-height tasks require the specified retention system.
Inspect, Record and Replace Helmets Before Protection Fails
Start each shift with a pre-shift helmet inspection, not a quick glance at the shell. Check these parts in order:
- Examine the shell for cracks, holes, deep scratches, deformation, chalking, or colour fading. UV damage can make plastic brittle; brittle plastic may break instead of absorbing impact.
- Inspect the suspension for torn or stretched webbing, missing straps, loose stitching, damaged sweatbands, and detached attachment points.
- Operate the adjustment mechanism and check that it locks securely. Test the chinstrap, buckle, and approved accessories for secure attachment.
- Look inside and outside for chemical stains, softening, distortion, burns, or heat damage. Remove the helmet from service if any defect appears.
Replace a helmet immediately after a significant impact, even when you see no crack. Cleaning and inspection cannot restore impact performance. Replace it after chemical contact or high-heat exposure when the manufacturer’s instructions require replacement, or whenever the shell or suspension shows damage.
Do not use a helmet beyond the manufacturer’s stated service life. There is no universal three-year or five-year rule; follow the date and service-life instruction marked by the manufacturer, while shortening use when exposure has been severe. Record the issue date, inspections, incidents, and disposal in a replacement record.
A site using Shree Krishna Safety Products for safety footwear can apply the same register discipline to every helmet.
Frequently asked questions
What hazards require industrial head protection?
Use head protection where work exposes you to falling objects, flying fragments, struck-by incidents, electrical contact, or damaging impacts.
What helmet markings should you check before choosing a helmet?
Match the helmet’s visible markings to the hazard and the applicable standard, including the protection category identified for the work.
Why must the shell, suspension, and retention system be chosen together?
The shell resists impact, the suspension manages energy and maintains clearance, and the retention system keeps the helmet stable during work.
How should you fit an industrial safety helmet?
Adjust the suspension so the helmet sits level, remains stable during movement, and does not shift when you bend, turn, or work at height.
When should you inspect or replace a safety helmet?
Inspect the shell, suspension, retention system, and markings before use; record findings and replace the helmet when damage or degraded components compromise protection.